My Dining Room Makeover was a little up cycling mission during Lockdown. My plan was to transform the room, bringing it up to date whilst making the best of what we had.
A Mission that I might just be able to tackle, despite nerves. I don’t know about you, but I’m always the same with a DIY project!) Being being stuck at home during Lockdown, was the perfect excuse not to put it off any longer.
In my last blog, I shared with you the little things that bought the little things, “the finishing touches” if you like, to a Mission that I was working on during Lockdown. I’m sharing how I tackled the somewhat daunting Mission of revamping our dining room furniture..
You asked for details on the products used and how I went about it – so here it is!!

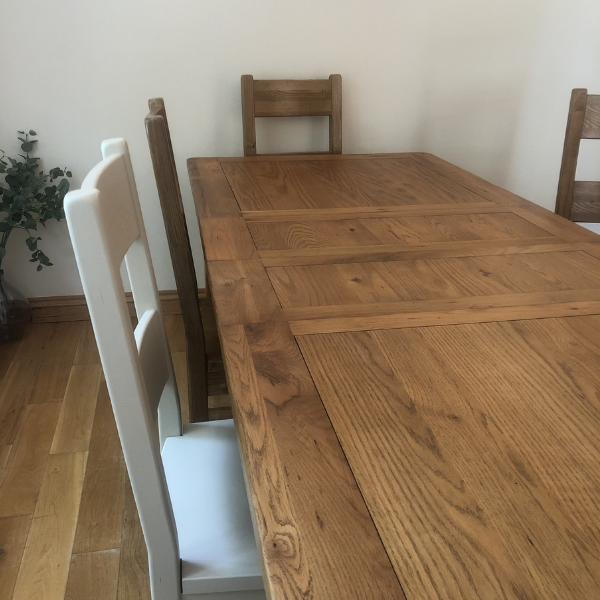
The Dining Room is mostly used for entertaining our family and friends (those were the days!) not to mention homework and family meals in the Autumn / Winter months. The room needed to be light, practical and on a budget. We had purchased dining furniture years before and it was still in really good condition, so couldn’t justify replacing it. However the solid oak wood had an effect on the brightness of the room, it felt out of date..
You’re never too old to start learning, and you’re never too young to aim high and achieve great things.
Asa Hutchinson
First things first.
The reason this project was so daunting was that the task seemed so big, that and that we had invested in the furniture years before – what if I ruined it..?? Replacing it simply, wasn’t an option…
The only way of knowing was to get to work!
I sought the advice of The Cotswold Company having bought one of their sideboards at around the time we bought the table and chairs. I have to say, their customer service is second to none – nothing is too much trouble. We have several items from the Cotswold Company and they have really stood the test of time..
Did you know they helpfully offer a colour match suggestion of their pieces on their website, together with other helpful information. Unfortunately, the piece in question was no longer available, although I have linked a similar sideboard in the caption below.

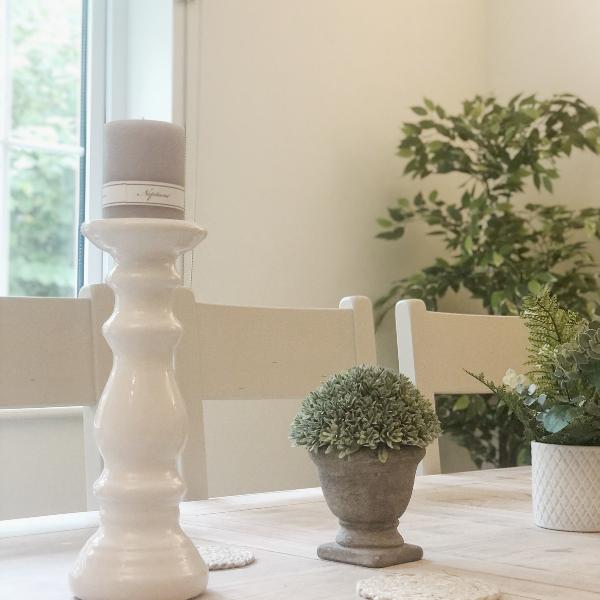
faux white gypsophila and stems from £12 all from Neptune,
Chiafron plant pot £3 Ikea.
Colour matching
I took one of the drawers from the sideboard to the Valspar paint service at B and Q where they coloured matched the paint perfectly.. Admittedly, the staff did look at me a little strangely, holding a drawer and wearing a mask, but they were fabulous and the paint matches to perfection.
Back home and the Dining Room Makeover Mission commenced..
Preparing the table and chairs
All 8 chairs were washed and prepped.. using the Valspar paint meant that I didn’t require any primer, hurrah! However, each chair did need three coats of paint, thankfully the weather was amazing and they dried quickly!
The table was another story.. After much debate, I decided to sand the tabletop, then treat it with lime wax and a neutral varnish to co-ordinate with the sideboard which I had completed earlier that month.. It was a mammoth task and despite knowing that it would look so much better, it was certainly a Mission in itself!
I used an electric sander which was fantastic and made light work of the sanding, not only did it work hard, but collected the dust too, a sure win!


Lime Wax
Once the sanding had been completed (admittedly it took a few days as I was fitting this project around the family, home schooling, Lockdown life – you get the idea!) I let the dust settle for a few days, literally and lime waxed the table top. I used Liberon Lime Wax, although there are many on the market, a very little goes a long way and it has made all the difference. Two coats were applied, using a soft cotton cloth as per the instructions. I then “sealed” the table and chairs with a coat of varnish which is specially designed for wood and painted surfaces and protects them with a highly durable, water and heat resistant film. A must on a heavy duty area such as a dining room furniture don’t you think!

The final part of my up-cycle Mission was to paint the legs and the sides of the table to match the chairs and sideboard. I had thought maybe the whole table would be painted the same colour but having decided to go ahead with the lime wax look, I’m really delighted with the end result.
If you read my blog last week, you’ll know what I used to complete the look of the room, bringing it all together with the help of home stylist Natalie from Neptune Weybridge.

Almost there! Just the radiator cover, the glass pendant lighting and a larger rug to source and my Mission will be complete.. Truly thankful to my friend Helen for her daily check-ins, she was an absolute star..
I’m thrilled with how this Dining Room Makeover Mission has turned out, the whole feel of the room has changed. It feels lighter, brighter and more spacious. Now we just need to wait until we can have our favourite people over for a Dinner Party! Little did I know just how long we’d have to wait..
Please do let me know any questions you may have and any thoughts you’d like to share in the comments. Of course, feel free to share with any friends who would love this Mission.
Have a super weekend,
Stay healthy and happy.


0 Comments